Language:

How to Choose the Right Recessed Downlight?

Choosing the right Recessed Downlight affects more than ceiling appearance. It influences comfort, energy use, safety, and daily visibility. A well-selected fixture should suit the room’s purpose, ceiling structure, and electrical system. A kitchen may need bright, wide illumination over worktops. A bedroom usually benefits from softer light and reduced glare. The same fitting cannot serve every space equally well.

Practical selection starts with measurable details. Check the lumen output, beam angle, colour temperature, colour rendering, and dimming compatibility. A 36-degree beam can highlight artwork, while a wider beam spreads light across a hallway. For living areas, 2700K to 3000K often feels warm and inviting. Workspaces may require a clearer 3500K to 4000K tone. Look for a high CRI when accurate colours matter. Verify the cut-out size before ordering. A small measurement error can leave visible gaps around the trim.

Safety deserves careful attention. Confirm insulation-contact ratings, heat management, moisture protection, and recognised electrical certification. Bathrooms and covered outdoor areas may require an appropriate IP rating. In real installations, poor ventilation can shorten LED life, even when the product looks premium. It is easy to focus on brightness alone. That is a mistake. Glare, shadows, and harsh colour can make a bright room uncomfortable. Product specifications also need independent checking, because marketing language may hide important limitations. The best choice balances performance, appearance, installation conditions, and long-term reliability. Even experienced buyers should review the ceiling plan before final approval.

How to Choose the Right Recessed Downlight?

Understanding Recessed Downlight Types and Their Applications

How to Choose the Right Recessed Downlight?

Understanding recessed downlight types helps match light to real spaces, not just ceiling holes. Fixed downlights suit corridors, bedrooms, and general ambient lighting. Adjustable gimbal models direct light toward artwork, kitchen counters, or reading chairs. Wall-wash fittings spread light vertically, making textured walls appear brighter. Wet-location versions are safer for bathrooms and covered outdoor areas, when local codes permit their use.

Start with lumens, beam angle, color temperature, and color rendering index. A narrow beam creates focused highlights, while a wider beam reduces harsh shadows across a worktop. Warm white light, around 2700–3000K, feels comfortable in living rooms. Neutral light, around 3500–4000K, often supports kitchens and offices.

The U.S. Department of Energy reports that LED lighting uses at least 75% less energy and can last up to 25 times longer than incandescent lighting. The International Energy Agency has also identified lighting as roughly 15% of global electricity consumption.

Efficiency matters, but comfort still matters.

Tips: Check ceiling depth before buying. Confirm insulation-contact and airtight ratings. Choose high CRI lighting for kitchens, galleries, and dressing areas. Measure spacing on site; equal gaps can still create uneven brightness. I have seen overly bright rooms feel less welcoming. More lumens are not always better. Review glare, dimmer compatibility, and maintenance access before installation. No selection guide is perfect; room surfaces and user habits can change the result.

Assessing Room Size, Ceiling Structure, and Lighting Requirements

How to Choose the Right Recessed Downlight?

Room size should guide lumen planning, not fixture count alone. A 12-square-meter bedroom may need roughly 1,200–2,000 lumens for comfortable general lighting. Kitchens often require more, especially above worktops. The Illuminating Engineering Society recommends higher illuminance for detailed tasks than relaxed living areas. In practice, 30–50 footcandles suit many kitchen work zones, while living areas often need less. These values are starting points, not rigid rules. Wall color, furniture, and daylight can change the result.

Ceiling structure matters just as much. Check joist positions, insulation, wiring routes, and available ceiling depth before selecting a downlight. An airtight, insulation-compatible housing can reduce heat loss and installation risks. For a standard 2.7-meter ceiling, spacing fixtures at about 1.2–1.8 meters can provide even coverage, but beam angle remains critical. Narrow beams create bright circles. Wider beams blend more smoothly. Measure twice.

Lighting quality deserves equal attention. The U.S. Department of Energy reports that LED lighting uses at least 75% less energy and lasts up to 25 times longer than incandescent lighting. Choose dimming compatibility, suitable color temperature, and a high color-rendering index for kitchens or dressing areas. A CRI of 90 or above often reveals skin tones and food colors more naturally. The imperfect part is easy to miss: too many downlights can make a ceiling feel cluttered and still leave shadows. Check the actual lux pattern before final installation. (Sources: IES Lighting Handbook; U.S. Department of Energy, Energy Saver.)

How to Choose the Right Recessed Downlight?

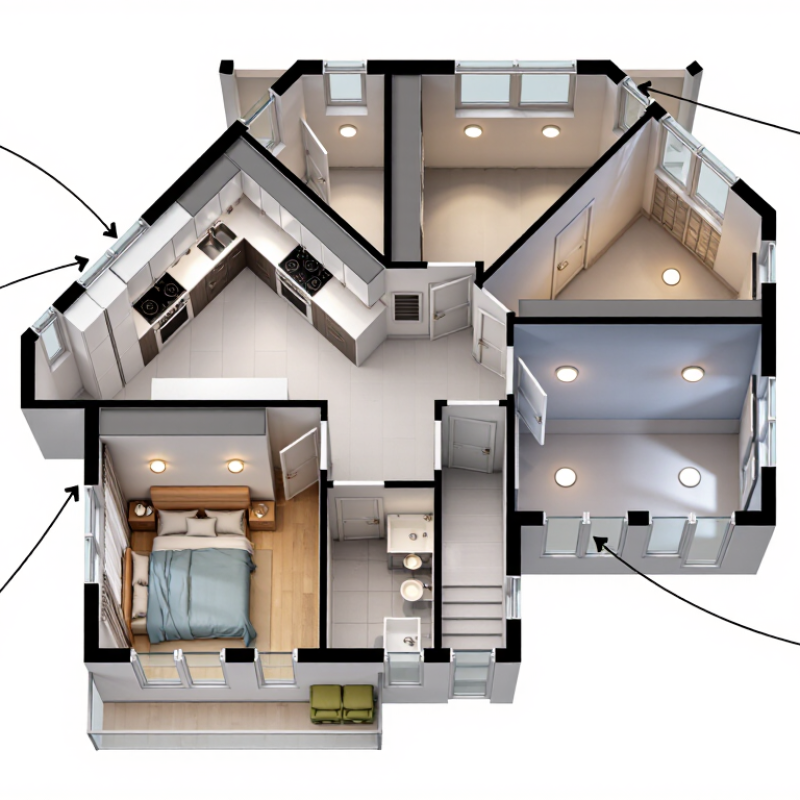
Assess room size, ceiling structure, and lighting requirements before selecting beam angle, wattage, and the number of downlights.

Recommended illuminance: Living rooms generally need 100–200 lux, bedrooms 100–150 lux, bathrooms 200–300 lux, kitchens 300–500 lux, and home offices 300–500 lux. Use the higher end for detailed tasks or darker finishes, and check ceiling depth to ensure the fixture and driver can be installed safely.

Choosing the Right Beam Angle, Brightness, and Color Temperature

A recessed downlight can look excellent in a showroom and feel harsh at home. I learned this after installing narrow beams over a small kitchen island. The bright spots were attractive, but the floor between them looked dull. Beam angle controls spread. A 24-degree beam creates focused pools for artwork or textured walls. A 36- to 60-degree beam usually gives softer, more even general lighting. Measure ceiling height and spacing before choosing.

Brightness should match the task, not just the fixture’s wattage. Lumens describe light output, while lux describes light reaching a surface. A reading corner needs more useful light than a hallway. In a modest living room, several moderate-output fixtures often feel calmer than a few powerful ones. Check the manufacturer’s lumen rating after the trim and lens are installed. That detail is easy to miss. Consider dimming, too. A light that cannot dim smoothly may become annoying at night.

Color temperature changes the room’s mood and material appearance. Warm 2700K to 3000K suits bedrooms, lounges, and wood finishes. Neutral 3500K to 4000K can support kitchens, bathrooms, and work areas. Very cool light may make white surfaces feel blue. It is not automatically brighter. Choose a high color-rendering rating when food, skin tones, or artwork matters. I once selected 4000K for a comfortable workspace, yet it felt clinical after sunset. A warmer setting would have been wiser. Review a sample at different times of day, because plans on paper can deceive.

Comparing Trim Styles, Ratings, Controls, and Energy Efficiency

Choosing the Right Recessed Downlight

Trim style changes both the beam and the room’s character. A deep baffle reduces glare, while a smooth reflector produces brighter, sharper light. Adjustable trims help aim light toward artwork or countertops. I once selected a narrow beam for a hallway, but the floor showed harsh bright spots. A wider beam would have looked calmer.

Ratings deserve careful attention. For insulated ceilings, choose a fixture approved for direct insulation contact when required. Airtight construction can reduce unwanted air movement through the ceiling. Bathrooms and covered outdoor areas may need damp or wet-location ratings. Always check local electrical codes and installation instructions. A qualified electrician should confirm the ceiling conditions.

Controls affect comfort and energy use. A compatible dimmer can lower light levels during evening hours, but not every LED dims smoothly. Flicker and buzzing are warning signs. Occupancy sensors work well in laundry rooms, while daylight sensors suit rooms with strong windows. Look for efficient LED performance, suitable color rendering, and a color temperature that matches the space. Warm light often feels comfortable in bedrooms. Neutral light can support kitchen tasks. My choice is not always perfect; a highly efficient lamp may still feel wrong if its color or glare is unsuitable. Test one fixture at night before ordering the entire set.

Planning Downlight Placement, Installation, and Long-Term Maintenance

How to Choose the Right Recessed Downlight?

Planning begins with the room, not the fitting. Mark furniture, worktops, walkways, and wall features before drawing a ceiling grid. The International Energy Agency reports that lighting consumes about 15% of global electricity. Efficient placement therefore affects both comfort and operating cost. Use narrower beams for artwork and wider beams for general circulation. A useful starting point is spacing fixtures about 1 to 1.5 times their mounting height. It is only a starting point. Dark finishes, high ceilings, and reflective surfaces can change the result.

Installation requires more than cutting neat holes. Confirm the ceiling structure, insulation clearance, fire requirements, and local electrical rules. Use fittings rated for the installation environment, especially in bathrooms or covered outdoor areas. Airtight models can reduce unwanted air leakage, but their certification must match the ceiling assembly. I have seen attractive layouts fail because drivers were buried above inaccessible ceilings. Leave a service route or accessible junction point. Small planning errors become expensive later.

Maintenance should be designed before installation. The U.S. Department of Energy notes that LED products can use at least 75% less energy and last far longer than incandescent lamps. However, LED performance still depends on heat control and driver quality. Review LM-80 and TM-21 documentation when comparing lumen maintenance claims. Clean visible trims gently and inspect flicker, discoloration, and delayed startup. I would also photograph the wiring before closing the ceiling. It feels unnecessary, until the first repair. A perfect layout is rarely perfect after years of use.

How to Choose the Right Recessed Downlight? - Planning Downlight Placement, Installation, and Long-Term Maintenance

A practical planning guide for selecting recessed downlights according to room use, ceiling conditions, lighting performance, installation requirements, and maintenance needs.

Planning Dimension Recommended Standard or Range Suitable Applications Installation and Placement Guidance Long-Term Maintenance Considerations
Room Function Choose light output and beam angle according to the task performed in the space. Living rooms, bedrooms, corridors, kitchens, bathrooms, offices, and retail areas. Use wider distribution for general ambient lighting and narrower distribution for task or accent lighting. Review lighting performance whenever the room layout, furniture, or wall finishes change.
Ceiling Height For typical residential ceilings of approximately 2.4–2.7 m, use moderate-output downlights with wide or medium beams. Residential rooms and small commercial interiors. Higher ceilings generally require greater lumen output, narrower beams, or layered lighting to maintain useful illuminance. Check for dark areas or excessive glare after installation and adjust the lighting plan if necessary.
Spacing Between Fixtures A common starting point is approximately 1.2–1.8 m between downlights in a standard-height room. General ambient lighting layouts. Keep the first row approximately 0.6–0.9 m from walls as a starting point, then refine according to beam angle and furniture placement. Replace failed units with products having comparable lumen output, beam angle, and color temperature to preserve visual consistency.
Illuminance Target Approximate targets: 100–200 lux for corridors, 100–300 lux for bedrooms and living areas, 300–500 lux for kitchens and work areas. Residential and general commercial spaces. Use a lighting calculation or on-site measurement for detailed projects; avoid relying only on fixture count. Clean lenses and diffusers periodically because dust buildup can reduce light output and create uneven illumination.
Lumen Output Approximately 500–900 lumens per fixture is often suitable for general residential applications, depending on ceiling height and spacing. Bedrooms, hallways, living rooms, and small offices. Use more fixtures at lower output when uniformity and lower glare are more important than concentrating light in fewer points. Confirm replacement lamps or integrated fixtures provide similar delivered lumens rather than comparing wattage alone.
Beam Angle Wide beam: about 60° or more; medium beam: about 36°–60°; narrow beam: below about 36°. Wide beams for ambient lighting; medium and narrow beams for artwork, counters, shelves, or architectural features. Wider beams can support greater spacing, while narrow beams require more accurate aiming and placement. Monitor glare and visible bright spots, especially in rooms with glossy floors, counters, or screens.
Color Temperature 2700–3000 K for warm residential ambience; 3500–4000 K for neutral work areas; 4000 K or higher for selected task environments. Warm tones for bedrooms and lounges; neutral tones for kitchens, offices, and utility areas. Maintain a consistent color temperature within the same visual zone to avoid noticeable color differences. When replacing fixtures, match both color temperature and color-rendering characteristics.
Color Rendering Kitchens, dressing areas, retail displays, galleries, and spaces with artwork or food. Higher color rendering can improve the appearance of materials, skin tones, food, and painted surfaces. Use replacement products with a comparable CRI rating to prevent inconsistent color appearance.
Glare Control Prefer recessed, baffled, or diffused designs with a suitable cut-off angle for the viewing environment. Living rooms, offices, bedrooms, and areas with televisions or computer screens. Avoid positioning fixtures directly over frequently viewed screens or in direct lines of sight; use layered lighting where appropriate. Inspect trim, baffles, and diffusers for yellowing, damage, or dust that may increase glare.
Dimming Compatibility Verify that the downlight and dimmer are designed to work together and support the intended dimming method. Bedrooms, living rooms, restaurants, hospitality areas, and presentation spaces. Test dimming range, flicker, minimum load, and control compatibility before completing large installations. Investigate flicker, buzzing, or unexpected shutoff promptly; these symptoms may indicate compatibility or wiring issues.
Color Consistency Open-plan areas, galleries, retail environments, and continuous corridors. Install products from the same specification and production batch when a uniform appearance is important. Keep a record of the installed specification to simplify future replacements.
Ceiling Material Confirm compatibility with plasterboard, suspended ceilings, timber assemblies, concrete, or other ceiling types. New construction, renovations, offices, and commercial fit-outs. Check the required cut-out diameter, fixture depth, spring-clips, mounting brackets, and access space before cutting. Inspect mounting security during routine maintenance, particularly in ceilings affected by vibration or movement.
Clearance and Heat Management Follow the product installation instructions for insulation clearance, ventilation, and driver placement. Insulated ceilings, timber ceilings, and confined ceiling voids. Do not cover fixtures or drivers with insulation unless the product is specifically rated for that installation condition. Check for discoloration, heat damage, unusual odor, or premature failure, and isolate electrical work for qualified personnel.
Moisture Protection Use a suitable ingress-protection rating for the location; wet areas require products approved for the relevant zone and conditions. Bathrooms, laundry rooms, kitchens, covered outdoor areas, and other humid spaces. Follow local electrical regulations and keep non-approved fixtures outside areas exposed to water or condensation. Inspect seals, trims, and lenses for cracking or deterioration; replace damaged components promptly.
Electrical Supply Confirm voltage, frequency, driver type, circuit capacity, and control-system requirements before installation. Residential, commercial, and refurbishment projects. All electrical connections should comply with applicable local codes and be completed by a qualified electrician where required. Record circuit grouping, driver locations, and control settings for troubleshooting and future alterations.
Energy Efficiency Compare delivered lumens per watt, useful life, standby consumption, and control compatibility rather than wattage alone. Projects seeking lower operating costs or reduced energy consumption. Use occupancy sensors, daylight controls, or dimming where they are suitable for the space and occupants. Keep controls calibrated and replace failed components with equally efficient alternatives where practical.
Maintenance Interval Inspect visually every 6–12 months; clean according to the environment and manufacturer instructions. Homes, offices, retail areas, kitchens, workshops, and public spaces. Provide safe access for cleaning and driver replacement, especially in high ceilings or commercial installations. Switch off and isolate power before servicing; never use abrasive cleaners or excessive liquid on electrical components.
Replacement Planning Document cut-out size, lumen output, beam angle, color temperature, CRI, dimensions, and control type. Installations with many identical fixtures or difficult access. Keep several compatible replacement units or a complete specification schedule for future maintenance. Replace fixtures in logical zones when visual consistency is important, rather than mixing visibly different specifications.
Member of

Associated Wire Rope FabricatorsMHI MemberNetPlus Alliance Member Steel Erectors Assocation STADFA member

Terms of Sale | Privacy Policy